MACRO
Understanding the Difference Between Closeup and Macro Photography
The classic definition of macro photography is that the image projected onto the digital sensor (or film plane) should be the same size as the subject. With a 1:1 ratio, a DSLR with a full-frame chip should be able to produce life-size magnification and focus on an area as small as 24x36mm.
Lets say that you shot a 3 centimeters hornet, if roughly filed your 35mm frame you shot a 1:1 ratio (Macro Monday Requirement). If it only filled half the frame you shot 1:2 ratio (Close up), and if you only got its head, it is 2:1 ratio (Mini Macro or True Macro).
Capturing the finest detail is one of the main differences between macro, micro close up photography.
Macro lenses are expensive for a reason. That being, a true macro lens allows the photographer to capture finer detail than would otherwise have been seen. For example, the hairs on an insects face, or the pattern in its eye.
Take the two photographs below for example. The first image is a very good example of a close up photograph, taken with a Nikon telephoto lens.
Macro Monday on Flickr is here. You have to join Flickr but it is free unless you want to pay for a Pro membership (the storage is larger).
(Photos below from https://www.slrphotographyguide.com/macro-micro-closeup-difference/)

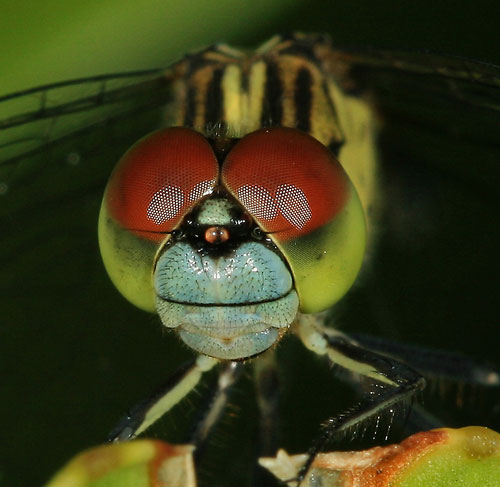
While the second photograph is a macro shot, allowing for bigger magnification and showing the finest detail.
Starting Point For Macro Settings ~
Shooting Mode: A/Av
Shutter Speed: 1/125 or faster
Aperture: f11 to f22
ISO: 400 and adjust as necessary for the shutter speed
Lens: Macro lens
Metering Mode: Center weighted
Format: RAW or JPG
White Balance: AWB or Auto
Tripod: Yes
Check back, updates and additional info will be added over time.
Note: This information was taken from different sources online and books to help explain Macro Photography and to offer tips and sometimes tricks to give myself and readers some reminders and help to get started.
If shooting on a white background use these setting:
To keep your photo nice and bright, you can put your camera in Aperture Priority mode and use a bit of exposure compensation (e.g., +1).
ISO 250, 1/160th of a second, shot at f/8
If shooting on a reflective background use these setting:


Comments
Post a Comment
Thank you for visiting my blog. I love reading your comments!